Tutorials
Everything you need to get going with Pupa! Start with the basics, then learn to use, build, and share a MiniApp.
Quick setup
The fastest path to a working Pupa: run the backend on your own machine with Claude Code or Codex, install the app, pair, and start chatting. About five minutes.
- Install the backend and run setup. Install and log in to either the Claude Code CLI or the Codex CLI first. The wizard checks the subscription harness you enable, then:
In the wizard, enable the Claude Code or Codex harness, and when asked “How will your iPhone reach the backend?” pick Cloudflare tunnel and answer no to the domain question: that’s the free quick tunnel, no Cloudflare account needed. (If Pupa is on the Mac running the backend, select Localhost.)uv tool install pupa-backend pupa-backend setup - Start the backend. This serves on
:8004and brings the tunnel up:pupa-backend run - Install the app. On a Mac, download Pupa and drag it to Applications. On iPhone and iPad it is TestFlight for now: join the public beta — no invite needed.
- Pair, then chat. Mint a QR code and scan it from the app:
In Settings ▸ Backend ▸ Edit, scan the QR. That’s it! Open a MiniApp and start talking.pupa-backend pair
MiniApp
What a MiniApp is, and how to use, build, and share one.
What is a MiniApp?
A MiniApp is an app you and your agent build together, just by talking.
What it is made of
- Blocks. A board, a calendar, a chart and so on. Snap them into whatever you need: a habit tracker, a money planner, a debate room.
- Memories. The app’s own notes, files and settings. Still there next week, and on your other devices.
Working with your agent
- You talk, it builds. Say what you want and the agent assembles it while you watch. You can move things by hand too.
- Equal footing. Anything you can do, the agent can do, and the other way round.
- It travels. The whole app packs into one file you can hand to anyone. It runs on their machine, with their keys.
You and your agent share the app’s Memories, a workspace of files. Its pupa/ folder works like a .claude/ folder, holding the skills, plugins and automations the app uses.
Use a MiniApp
Open one and start talking. The agent moves things around while you watch, and you can edit the same screen by hand.
- Open a MiniApp from your library.
- Type what you want in the side-panel chat: “log today’s run”, “add milk to the list”, “show me this month”.
- Watch the blocks rearrange. Edit any field by hand too.
- Come back tomorrow. Everything is still there, on all your devices.
Build a MiniApp
No templates to pick from. Describe what you want and shape it as you go.
- Start a new MiniApp and tell the agent what it is for.
- Ask for the pieces you need: a tracker, a calendar, a checklist, a chart. They link up to each other.
- Keep talking to change it. Rename things, add fields, move blocks around.
- Nothing resets. The app keeps growing with you.
The building blocks
Components
Every MiniApp is built from these blocks. Ask for the ones you need and they link up into one app. The agent works them like tools, and you edit the same screen by hand.
Multi-field records in a table or kanban: fields, filters, and cards.
Time-indexed events in a list or month grid.
Simple done / not-done items, with no per-row fields.
A live numeric model with tunable inputs and formula rows.
Pie, bar, or line visualisation of tracker or calculator data.
Multi-agent chat rooms: subagent personas, channels, and @-mentions.
The set isn’t a fixed menu. It’s an extension point. You can add your own canvas shape with a documented, compiler-enforced recipe, and every kind declares how it travels in a .pupa bundle. Read: custom components & the portability policy →
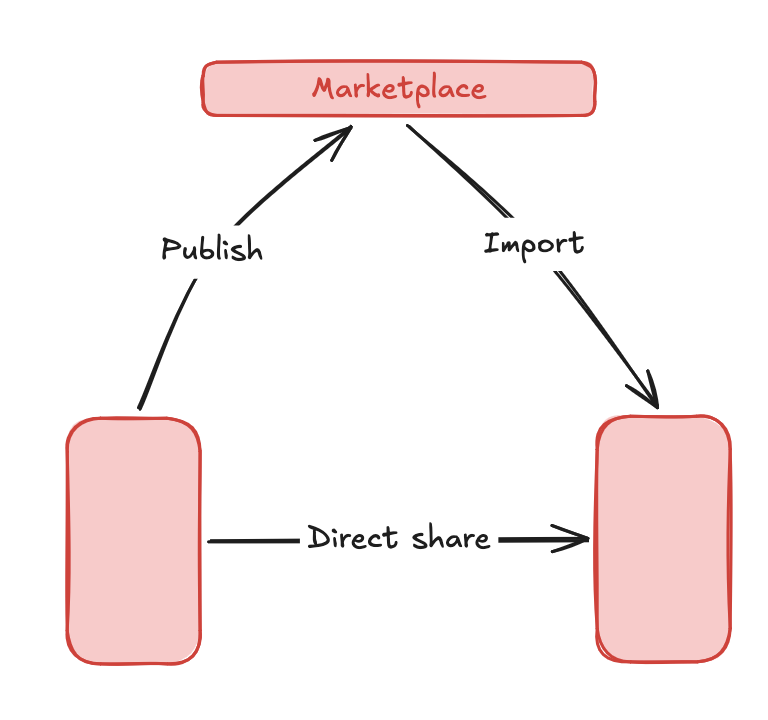
index.json anyone can host) for others to import.Where your data lives
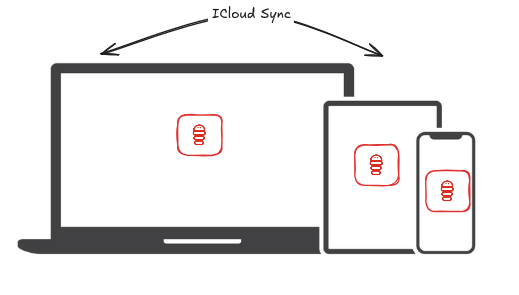
Pupa has no cloud of its own. Your apps run on your devices, sync through your iCloud, and talk to a backend you run. So your data stays with you, not with us.
- Your MiniApps and settings live on your devices. They sync between your iPhone, iPad, and Mac through your own iCloud, under your own Apple ID. There’s no Pupa account and no Pupa server in the middle.
- Your keys never leave your machine. The app connects to a backend you run, so your API keys and logins stay there. The pairing token is kept in the iOS Keychain and is never synced.
- The only thing that leaves is your chat with the model. What you send the agent goes to your LLM provider (Anthropic, OpenRouter and so on) under your own key. That’s the same trust you already place in that provider, and nowhere else.
Run your own backend
Pupa is user-owned: the app pairs to a backend you run, and your model credentials never leave your machine. Pick a harness or model provider, install the CLI, pair, and you’re live. Full reference lives in the pupa-backend README.
Install the CLI (PyPI)
Install pupa-backend from PyPI with uv:
uv tool install pupa-backend # latestRun the setup wizard once, then start the server:
pupa-backend setup    # interactive — writes ~/.pupa-backend/config.yml
pupa-backend run      # serves on http://localhost:8004
Prefer it always-on? Install it as a background service (logs go to ~/.pupa-backend/logs/).
pupa-backend service-install   # install and start the background service
pupa-backend status            # is it running?
pupa-backend logs              # tail the service log
pupa-backend service-stop      # stop and remove it
Credentials live in your shell env (see the backend’s .env.example), never in the config file.
Option A · Claude Code (subscription)
Claude Code is a harness: a self-contained agent loop the backend runs on your existing Claude subscription instead of metered API tokens. Install the Claude Code CLI so the claude binary is on your PATH, then enable the harness in ~/.pupa-backend/config.yml:
harnesses:
  claude_code:
    enabled: true
Every enabled harness is mounted separately, so the app shows a Claude Code option in its per-connection harness picker, no app update needed. It uses Claude Code’s native host tools, gated by the permission controls the app renders.
Option B · Codex (subscription)
Codex is also a first-class harness. It runs through your ChatGPT subscription instead of metered API tokens. Install the Codex CLI, make sure the codex binary is on your PATH, and sign in before enabling it:
codex login

harnesses:
  codex:
    enabled: true
The app then shows Codex in the same per-connection harness picker. Codex brings its native file, shell, and web tools, while Pupa renders controls for read-only, workspace, or full host access. The backend requires a ChatGPT login and does not pass API billing keys to the Codex child process.
Option C · OpenRouter (300+ models)
Prefer metered API access or non-Claude models? Point the backend at OpenRouter, an OpenAI-compatible endpoint. Set these in your shell env:
LLM_PROVIDER=openai_compatible
LLM_BASE_URL=https://openrouter.ai/api/v1
LLM_API_KEY=sk-or-...
LLM_MODEL=anthropic/claude-sonnet-4.6
Or set just OPENROUTER_API_KEY=sk-or-... to unlock the curated in-app model picker (GLM, Qwen, MiniMax, Kimi, DeepSeek). The client chooses the model per request, no LLM_MODEL needed.
Connection channels
How does your phone find the backend running on your laptop? Three ways, from quietest to most reachable.
Cloudflare tunnel: a public HTTPS URL to your backend, reachable from anywhere with no ports to open.
“How will your iPhone reach the backend?” is the question in pupa-backend setup that picks your connection channel. It’s saved as connectivity in config.yml; re-run setup any time to change it. Three options:
- Localhost: same machine only. The app talks to
http://localhost:8004and nothing leaves your computer. Ideal when the macOS app runs on the same Mac as the backend: no tunnel, no exposure. - Cloudflare tunnel: a public HTTPS URL to your backend with no ports to open. The free quick tunnel needs no domain and no account (the backend brings it up on
run), but its URL changes on every restart, so you re-pair each time. Own a domain on Cloudflare? Choose “I have a domain” for a named tunnel with a stable URL: pair once, never again. - Tailscale: a private mesh VPN across your own devices (free). You get a stable MagicDNS name and traffic stays private instead of being published to the internet; the wizard generates a self-signed TLS cert for it. Recommended for everyday remote use. Needs Tailscale installed and running on both the backend host and your phone.
Whichever you pick, pairing is the same flow below. The channel just decides which URL the QR code embeds.
Pair the app
With the backend running, mint a pairing code and scan it from your device:
pupa-backend pair # prints a QR pairing codeIn the app, go to Settings ▸ Backend ▸ Edit and scan the QR (or paste the code). Pairing is one-time. After that the app reconnects on its own.
Screen-share
Optional, and macOS only. Lets the agent see your screen. You build this one from source.
The sidecar is built from source, so use the one-line source installer instead of the PyPI package (it clones the repo and compiles the sidecar):
curl -fsSL https://raw.githubusercontent.com/pupa-app/pupa-backend/main/install.sh | bashEnable the broker in config.yml (or PUPA_SCREENSHARE=1), then start publishing from the same Mac:
screenshare: true # in ~/.pupa-backend/config.ymlpupa-backend screenshareRequires macOS 14+ and the Xcode toolchain (the first run compiles the Swift sidecar). The broker stays off by default and on hosted multi-tenant deployments.
Deploy to the cloud (Railway)
For when you would rather not leave a laptop running.
The repo ships a ready-to-deploy Railway config: railway.json and a Dockerfile at the root, plus a baked cloud-config.yml with multi-tenant-safe defaults. You just fork it, point Railway at your fork, add a database, and set a few secrets:
- Fork pupa-backend on GitHub.
- On Railway: New Project ▸ Deploy from GitHub repo → pick your fork. Railway auto-detects
railway.json+Dockerfileand builds the image. The first deploy fails until env vars are set. That’s expected. - Add the Postgres plugin (New ▸ Database ▸ PostgreSQL). Railway injects the connection string, which the backend auto-parses into its checkpointer + store.
- Set the service Variables, then redeploy:
ANTHROPIC_API_KEY=sk-ant-...              # or OPENROUTER_API_KEY=sk-or-...
PUPA_API_KEY=<random>                     # openssl rand -hex 32 — bootstrap pairing key
DATABASE_URL=${{Postgres.DATABASE_URL}}      # reference the Postgres plugin
The safety posture (shell off, screen-share off, no MCP servers) is baked into the image. Don’t override it on a public deployment. Railway redeploys on every push, so your fork stays in sync. Once the deploy is green, pair against your https://<svc>.up.railway.app URL.
Optional: add OPENROUTER_API_KEY, AWS_*, or LANGFUSE_* to unlock more models and tracing. Full walkthrough in docs/deploy.md.
Open source
Contribute
Add new blocks (canvas components) to the app, or new agent hookups to the backend. Components are just SwiftUI views with a typed model, so you can build agent-compatible surfaces without any agentic knowledge. The repos, client, backend, and marketplace, are all open-source.
The native iOS / macOS application. Ships the SwiftUI canvas, its components, the Memories filesystem, and how those are surfaced to your backend harness.
The user-owned backend. Hooks into the agent harness running on your laptop (like Claude Code or Codex). Run it locally or deploy your own in the cloud.
A catalog of .pupa bundles you can browse and install from the app. Just an HTTPS index.json anyone can host.